When you’re ordering a new door, the key to a smooth installation is getting the rough opening measurements right. A small mistake can lead to fitting issues, delays, and added costs. By following the right steps and using the proper tools, you can avoid common errors and ensure your door fits perfectly.
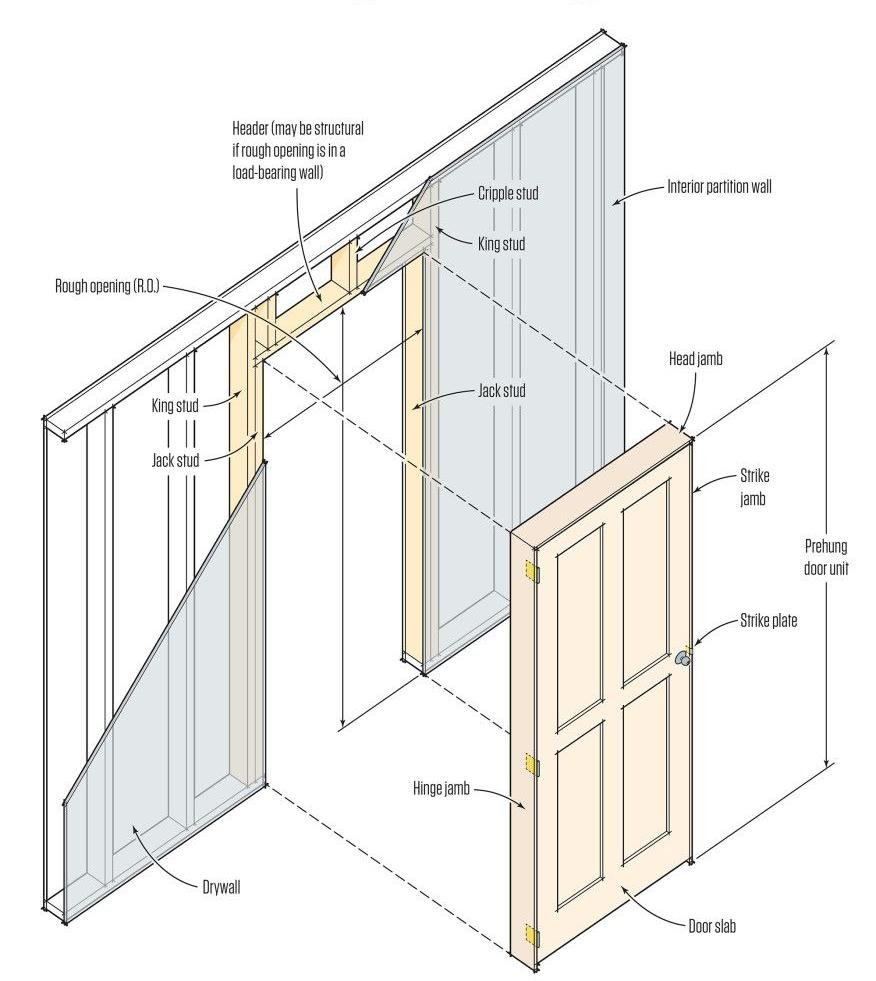
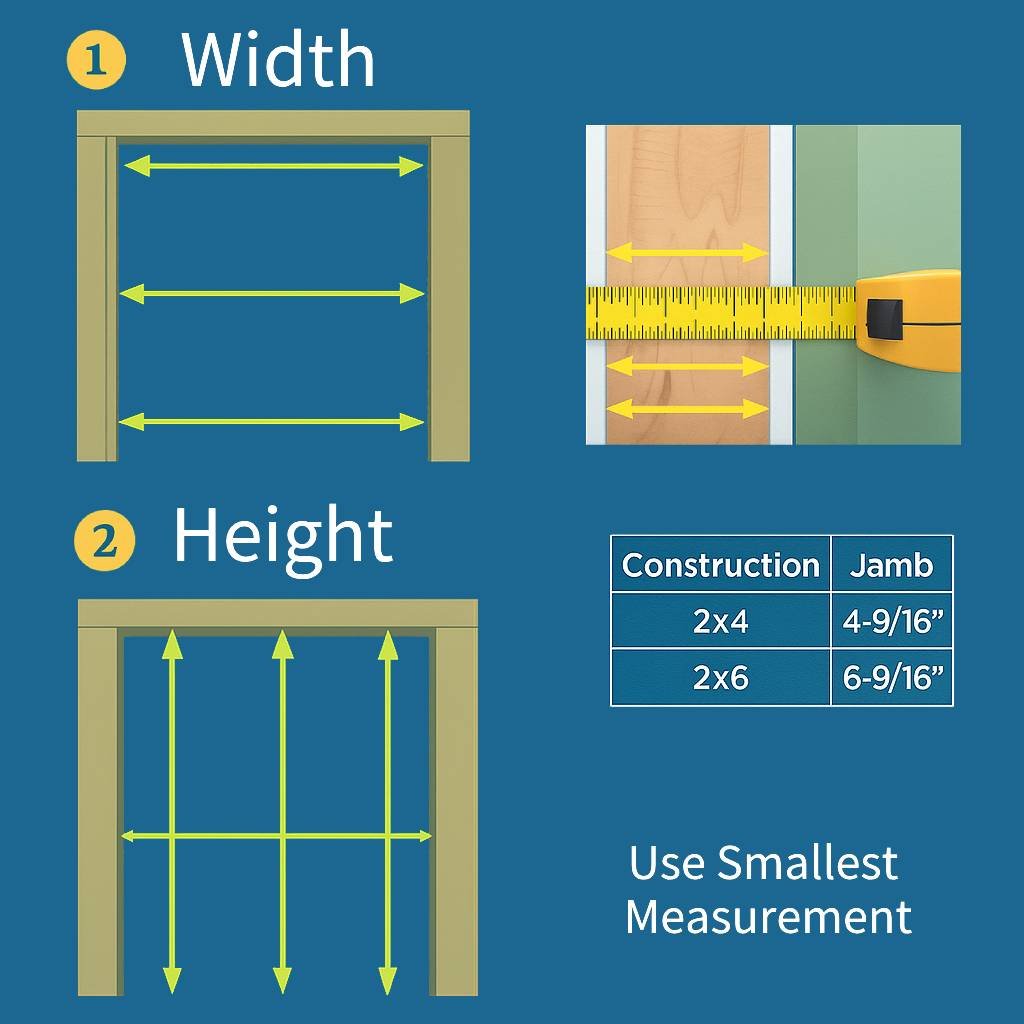
The process of measuring a rough opening for a door involves a few simple but critical steps. Start by measuring the width and height of the opening, leaving extra space for the door frame and shims. The general rule is to add 2 inches to the door’s width and 2 ½ inches to the height. Always measure in three places – top, middle, and bottom – and use the smallest of these measurements for the width. This will ensure the opening is square and the door fits properly.
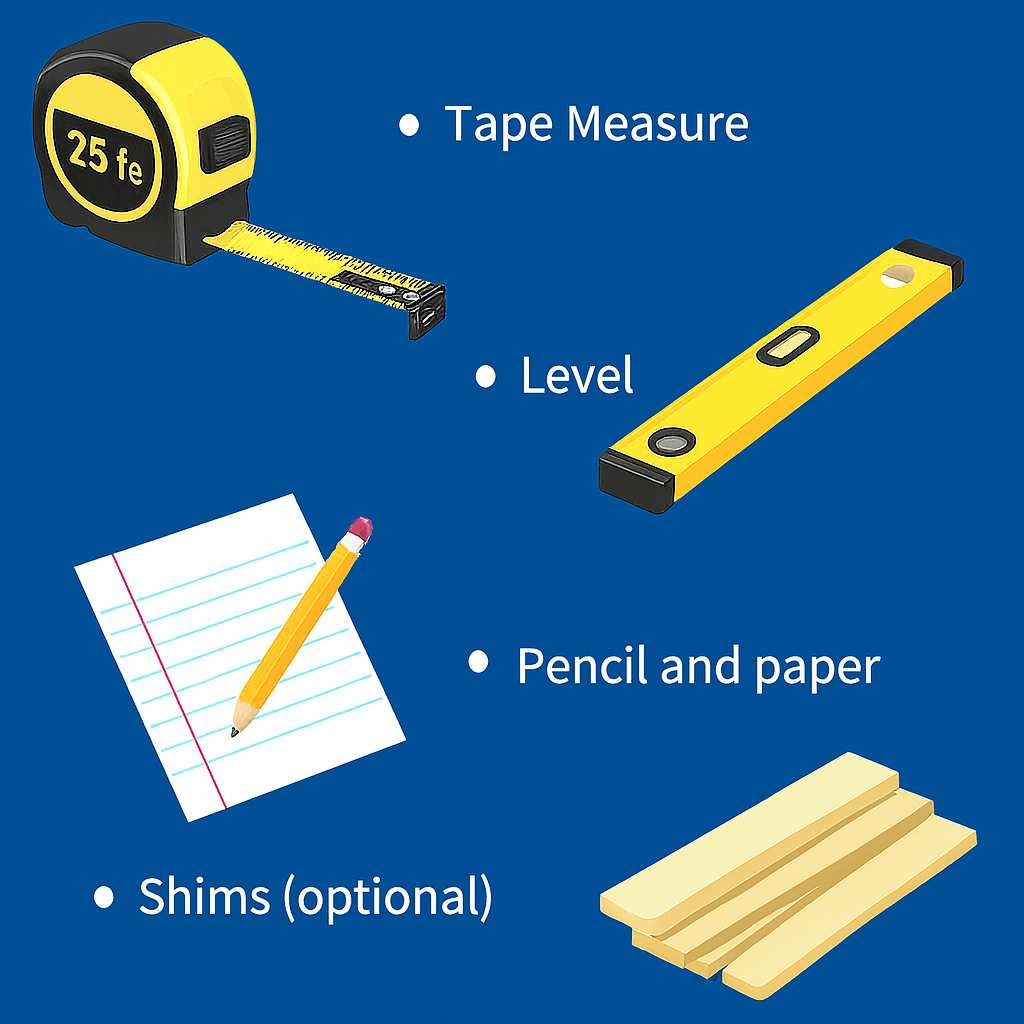
Materials Required for Preparation
Before you begin measuring, make sure you have the following tools ready:
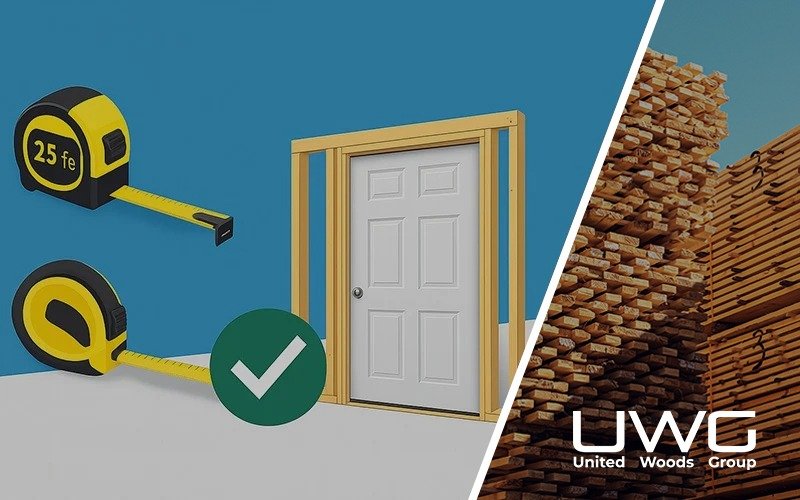
- Tape measure: A reliable, flexible measuring tape (preferably 25 feet or longer).
- Level: To check if the opening is plumb and square.
- Pencil and paper: For noting measurements.
- Shims (optional): These are used to adjust for minor gaps when fitting the door.
Specific Operational Steps to Measure Rough Openings
Step 1: Measure the Width
To measure the width of the rough opening, place your tape measure between the two studs at the top of the opening. Then, measure again at the middle and bottom. The width measurement should be taken from the inside of one stud to the inside of the other.
Step 2: Measure the Height
Next, measure the height from the underside of the header to the floor at both the left and right jambs. Just like the width, measure at three points: the left, center, and right.
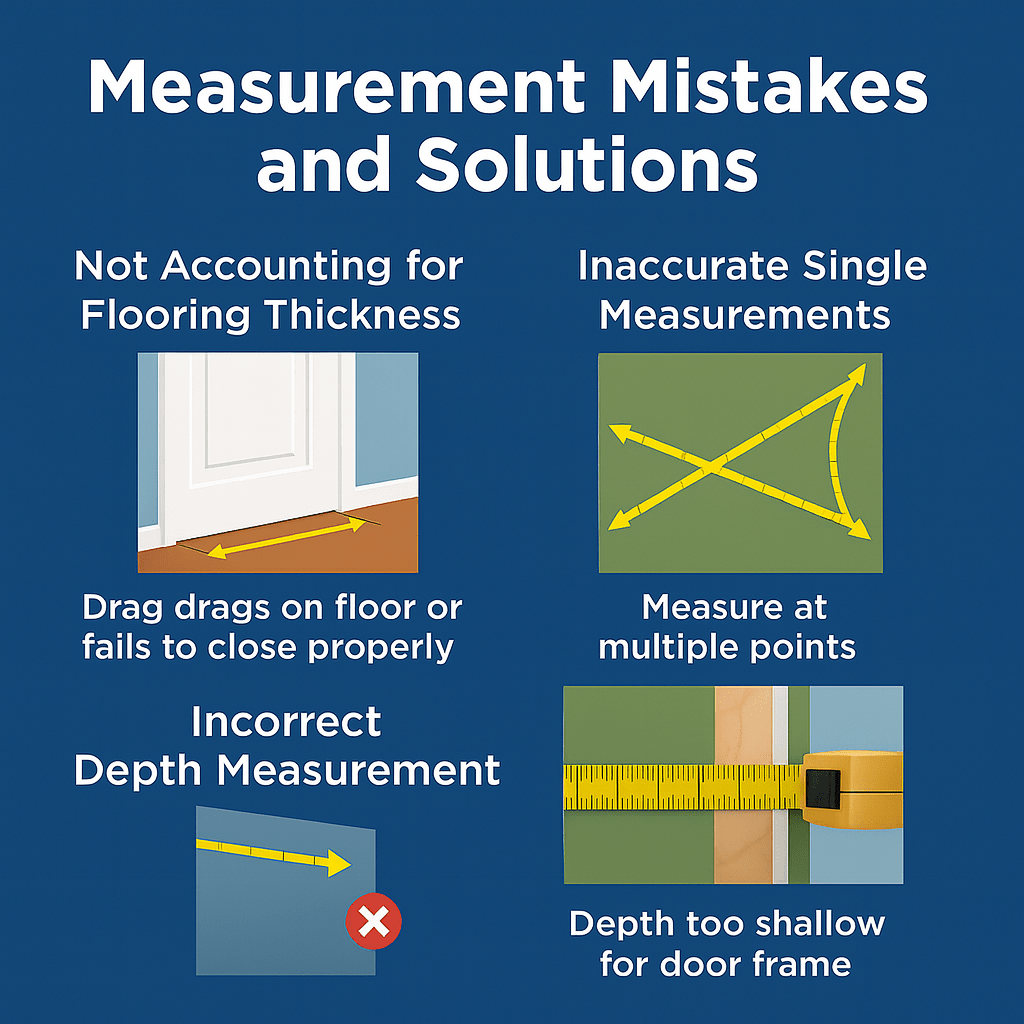
Step 3: Check the Depth
Finally, measure the depth of the rough opening. The depth is the distance between the exterior surface of the wall and the back of the framing. Typically, the door frame should fit into the opening with a depth that matches the thickness of your wall and any drywall.
Step 4: Use the Smallest Measurement
After measuring, use the smallest measurements for both width and height. This ensures your door will fit securely and squarely within the frame.
Explanation of Special Cases
Irregular Openings
Sometimes, walls and frames are not perfectly square or plumb. If you notice any irregularities in your measurements, it’s important to correct them before ordering your door. You might need to adjust the rough opening size or use shims to ensure the door frame fits properly.
Custom Door Sizes
If you’re ordering a custom-sized door, you might need to adjust the rough opening size to accommodate the specific dimensions of the door. In these cases, always double-check your measurements and consult with your supplier to ensure compatibility.

Conclusion
Getting the rough opening measurement right is essential for a successful door installation. By following these steps and using the proper tools, you can avoid mistakes and ensure your door fits perfectly. Accurate measurements save you time, money, and the headache of dealing with an ill-fitting door.
Now, you’re ready to order the right door for your space!