Adding wood moulding to the bottom of kitchen cabinets is a simple yet transformative project that can elevate the look of any kitchen. Whether you’re a homeowner looking to give your space a fresh new look or a builder seeking to add a professional touch to your projects, understanding the steps to install wood moulding is essential.
But why is wood moulding such a popular choice in kitchen design? The answer lies in its ability to blend functionality with aesthetics, creating a polished and cohesive look. This guide will walk you through the process, from gathering the necessary tools and materials to applying the finishing touches. Let’s dive into the details and explore how you can achieve a seamless and elegant look with wood moulding on your kitchen cabinets.
- What Tools and Materials Do You Need to Install Wood Moulding?
- How Do You Measure and Cut Wood Moulding for a Perfect Fit?
- What is the Best Method for Attaching Wood Moulding to Cabinets?
- How Can You Ensure a Seamless Look Between Moulding Pieces?
- What Finishing Touches Should You Apply After Installing Moulding?
- How Does Adding Wood Moulding Enhance the Overall Look of Your Kitchen?
- Conclusion
What Tools and Materials Do You Need to Install Wood Moulding?
Before you begin the installation process, it’s crucial to gather all the necessary tools and materials. Having everything on hand will make the process smoother and more efficient. Here’s a list of what you’ll need:
- Measuring Tape: For accurate measurements of the cabinet length.
- Miter Saw: To cut the moulding at precise angles.
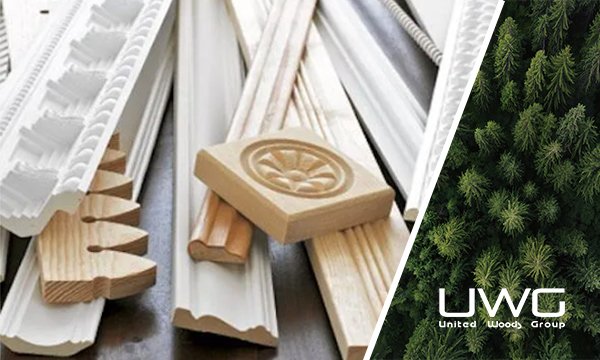
- Wood Moulding: Choose a style that complements your kitchen’s design.
- Construction Adhesive or Wood Glue: For securing the moulding in place.
- Finishing Nails and Hammer or Nail Gun: To firmly attach the moulding.
- Caulking Gun and Wood Filler: To fill any gaps and ensure a smooth finish.
- Sandpaper: For smoothing out rough edges.
- Paint or Stain: To match or complement your cabinets.
- Level: To ensure the moulding is aligned perfectly.

How Do You Measure and Cut Wood Moulding for a Perfect Fit?
Accurate measurement and cutting are critical to achieving a professional-looking result. Start by measuring the length of the cabinet bottom where the moulding will be installed.
- Measure Twice, Cut Once: Ensure you double-check your measurements before making any cuts.
- Use a Miter Saw: This tool is essential for making precise 45-degree cuts at the corners. This will allow the moulding pieces to fit together seamlessly.
- Cutting Techniques: Make sure the saw blade is sharp and set to the correct angle. Cut slowly and steadily to avoid splintering the wood.
By following these steps, you’ll ensure that each piece of moulding fits perfectly against the cabinet and adjacent pieces.

What is the Best Method for Attaching Wood Moulding to Cabinets?
Attaching the moulding securely is crucial for both aesthetics and durability. Here’s how to do it:
- Apply Construction Adhesive: Spread a thin layer of adhesive along the back of the moulding. This will help hold the moulding in place while you secure it with nails.
- Nail the Moulding: Use finishing nails to attach the moulding to the cabinet. If you’re using a nail gun, make sure the pressure is adjusted so the nails don’t go too deep.
- Spacing and Alignment: Keep the moulding aligned with the cabinet’s bottom edge. Use a level to check for straightness as you work.

How Can You Ensure a Seamless Look Between Moulding Pieces?
A seamless appearance between moulding pieces is key to a polished final product. Here’s how to achieve it:
- Use Wood Filler: After nailing the moulding in place, inspect the joints between pieces. If there are any gaps, fill them with wood filler.
- Caulk the Joints: Apply caulk to the seams where the moulding meets the cabinet. This will fill in any minor gaps and create a smooth transition.
- Sand the Edges: Once the filler and caulk have dried, sand the edges to ensure a smooth and even surface.
These steps will ensure that the moulding looks like a natural extension of your cabinets, rather than an add-on.

What Finishing Touches Should You Apply After Installing Moulding?
The finishing touches are what will make your moulding installation look complete and professional. Consider the following:
- Painting or Staining: Depending on your kitchen’s color scheme, you can either paint or stain the moulding. If painting, apply a primer first for better adhesion.
- Seal the Finish: After painting or staining, apply a clear coat of sealant to protect the moulding from moisture and wear.
- Final Inspection: Look over the entire installation to ensure all gaps are filled, and the finish is smooth. Make any necessary touch-ups.

How Does Adding Wood Moulding Enhance the Overall Look of Your Kitchen?
Finally, it’s essential to understand why adding wood moulding is worth the effort. Here’s how it enhances the kitchen:
- Adds Elegance and Character: Moulding can transform plain cabinets into elegant, custom-looking pieces.
- Covers Gaps: Moulding can also hide any gaps or uneven edges at the bottom of your cabinets, providing a clean finish.
- Increases Value: A well-finished kitchen with wood moulding is likely to appeal more to potential buyers, increasing the value of the home.
By adding wood moulding, you can achieve a high-end look in your kitchen without the high-end price tag. Whether you’re a homeowner or a builder, this project is a valuable addition to any kitchen renovation.

Conclusion
Adding wood moulding to the bottom of kitchen cabinets is a rewarding project that can dramatically enhance the appearance of your kitchen. With the right tools, precise measurements, and careful attention to detail, you can achieve a seamless, professional finish that adds elegance and value to the space. Whether you’re tackling this project as a homeowner or a builder, the steps outlined in this guide will help you create a polished and cohesive look that elevates your kitchen’s design. So, roll up your sleeves and get started—your kitchen’s transformation is just a moulding away!


